

 |
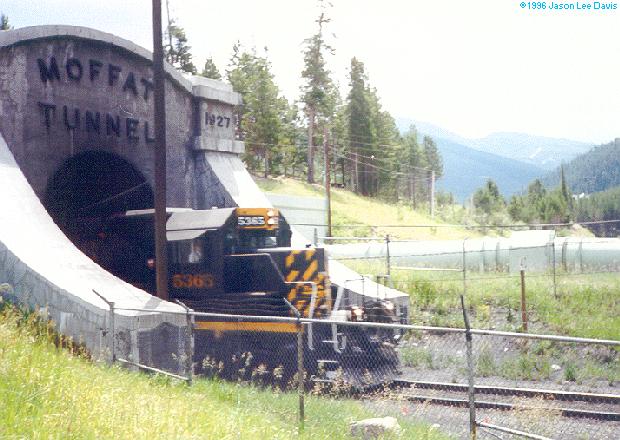
| DRGW5365 Emerges from the Western Portal of the Moffat Tunnel in 1996. Photo by Jason Lee Davis. |
Cameron Turner
|
| DRGW5365 Emerges from the Western Portal of the Moffat Tunnel in 1996. Photo by Jason Lee Davis. |
Cameron Turner
 |
| An SP Patch (UP6361) leads two more UP units west towards Fraser, Colorado. Photo by John Crisanti. |
In Part 3, we ended with the reveal that our fifth job called was to be the Table Job, which would be our first job to repeat so far in the operating session. So, what are the rules about repeating jobs?
It is desirable for jobs to repeat at some frequency on the branch. After all, there is a finite amount of work, and some jobs need to happen more often than others. However, I did not want jobs to repeat to regularly. Back-to-back identical jobs for instance would not generally make sense. So, I incorporated two job history lists in the system. The first is a short history that says that no job can occur again in less than four cycles. So, we could have had the table job occur in place of the McIntyre Job, but no sooner. The second history is a long history which prevents certain tracks from being worked more than once a shift, such as the team track. Both of these parameters can be varied, but I think the short history works very well at a length of 4. The exception is the McIntyre Job, which can occur more often because it is actually 2 different jobs, McIntyre A and McIntyre B.
So, at this point, we have once again drawn a Table Job, but in this case as luck would have it, we have 8 cars in the job this time. So, here is the job, ready to depart East Yard.
 |
| Table Job ready to Depart East Yard. |
And here is the job ticket for the table job this time.
 |
| Job ticket for the second occurrence of the Table Job. |
Once again, we have to update the work at the Brewery.
 |
| Brewery Status when the second Table Job Arrives. |
In this case, we produce 4 loaded cars from cars already on the Table tracks, 3 more loads from cars we brought to the tables, and one car which we pick up from the Keg track. There are two more cars on the Keg track ready to pick up, but we are limited to 8 cars on the train. Thus, the Brewery looks like this when we are finished.
 |
| Brewery Status after the second Table Job. |
The train returns to East Yard and delivers its 8 loads to the Departure Track. The Departure track is now full, and is ready for an arriving interchange train from the Golden Branch.
 |
| East Yard after the Second Table Job Returns. |
This incoming interchange train will drop off new cars to be sorted in the East Yard and collect the departing cars collected from the Coors Branch.
 |
| East Yard with an arriving interchange train from the Golden Branch. |
Meanwhile, work continues, and the next job randomly selected is the Table Job again. Since the Table Job was just run, the system randomly selects another job, and so the Receiving Job got pulled, with this Job Ticket.
 |
| Job Ticket for the Receiving Job. |
The Receiving Job is assigned five cars from East Yard and prepares to depart for the Receiving Plant.
 |
| Receiving Job Ready to Depart East Yard. |
Once again, work is performed around the layout and so the Receiving Plant status looks like this when the Receiving Job arrives.
 |
| Receiving Job arriving at the Receiving Plant. |
The receiving job spots its five cars and pulls 8 empties from the Receiving Plant before departing back to East Yard.
 |
| Receiving Job departing the Receiving Plant |
The job returns to East Yard, and uses these cars to begin to assemble the next departing Beer Train.
 |
| Receiving Job Returns to East Yard |

 |
| After Switching McIntyre Yard, the McIntyre Job is ready to depart for the Brewery. |
 |
| Arriving with cars for the Brewmaster Track #1. |
 |
| Ready to depart the Brewery for McIntyre Yard. |
 |
| End of the McIntyre Job (type B). |
I finally got around to putting together the brief video I shot of the T gauge Layout I have been building for the CRMHA and show each year at the Central Train Show in February. You can see some of the related posts here.
The end of the video also shows the new 120mm Radius Concrete Viaduct that I have offered through ModelWorks. There is already a 132.5mm Radius version, so there are now two options for the T gauges out there.
I have a number of additional project en route for both ModelWorks and for this little T gauge gem. I particular, I am interested in the rumored new turnout that may be available in December? At least I hope so. COVID-19 has a couple of other projects delayed.
Cameron
 |
| Am abandoned trestle on the original Moffat Line above Winter Park. The old Denver and Salt Lake Mainline touched the top of the world on this route. Photographer Unknown. |

