Thursday, February 23, 2017

The Fabled Marshall Pass

The Marshall Pass roue was the original narrow gauge rout between Denver and Salt Lake City. The 3rd Division as it was called ran from Salida to Gunnison over Marshall Pass. From Gunnison, the line continued west through the Black Canyon of the Gunnison over Cerro Summit, and ran into Montrose. The line closed in the early 1950s, and was torn up by 1955, with the exception of the Monarch Branch which was standard gauged and continued operating that way into the 1980s.  The Marshall Pass crossing crested the continental divide at 10,842 feet, well above Tennessee Pass and the Moffat Tunnel.


As the primary narrow gauge line of the D&RGW, the line saw impressive narrow gauge traffic into the 1940s, but after WWII that traffic began to drop dramatically. The largest D&RGW narrow gauge engines, the K-36s and K-37s plied the line.

K-36 DRGW#489

K-37 DRGW#494


The line was severe, with 4% grades, and multiple turnback curves. Much of the line over Marshall Pass is still there, and can be driven in the summer months. 


From Salida, the line headed west to Poncha Junction, where the line swung south and the Monarch Branch continued west towards Monarc Pass. Shortly thereafter, the line reached Mears Junction, a unique junction where the D&RGW crossed over itself, with one line continuing to Marshall Pass and another climbing over Poncha Pass to descend into the San Luis Valley and Alamosa.

The main continues up the pass, winding through Shirley and Gray's, ultimately cresting the pass and encountering a major snowshed to protect the crossing. The snowshed covered the station, a passing track and even a turntable. 


Marshall Pass Snowshed.


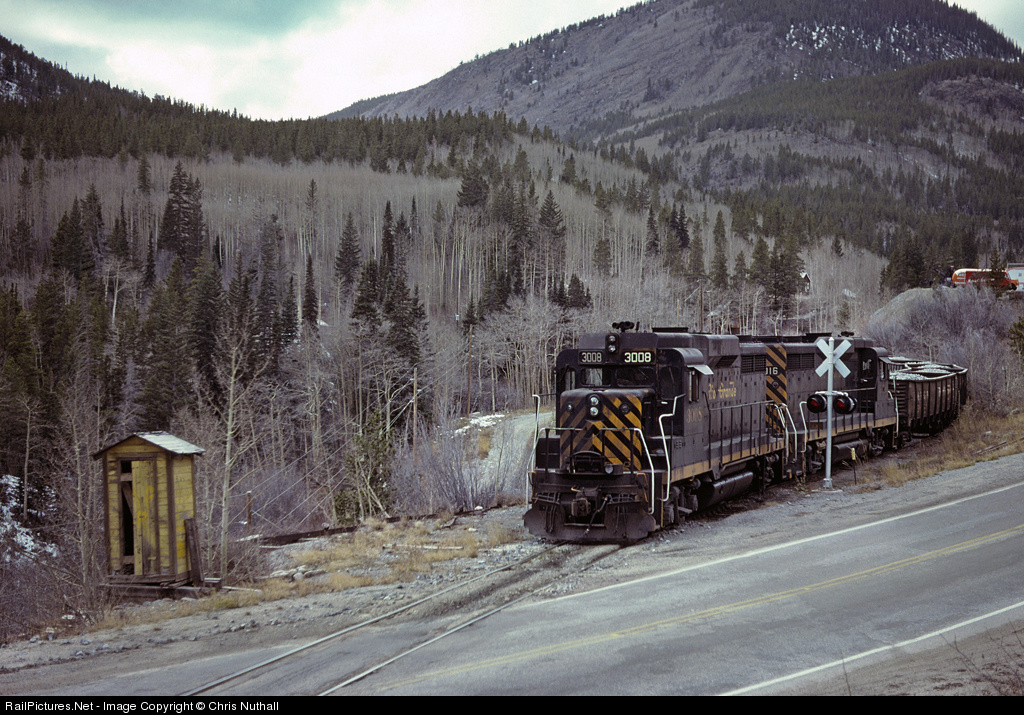
Western Side of Marshall Pass.

The western descent is also significant. The line descends through multiple curves through Shawano, at times allowing the train to pass through the same scene at least 4 times! This stretch o the line is remote, We work through Chester and Buxton and Sargent. From there, the line opens up, and runs across the valley to Gunnison. Gunnison was a division point, and the connection to additional branch lines. The main continued west out of Gunnison, and plunged into the Black Canyon of the Gunnison. This canyon was followed through the canyon until Crystal Creek enters the canyon. At this point, the canyon became so rugged that the line had to climb out of the confines of the canyon, and crest a ridge known as Cerro Summit, near the town of Cimarron. This pass was unspectacular, especially against such passes as Cumbres, Tennessee, Palmer, and Marshall.


Much of this route between Gunnison and Montrose now lies underwater. But along te route lies places such as Sapinero, and Curecanti, places that inspired the original D&RGW logos and advertizing. Now, Blue Mesa reservoir hides much of this region.

Image result for Curecanti Needle photos

The railroad grade is somewhere below the surface.

I have built numerous Nn3 modules using Z-scale track, mechanisms and trucks, to represent N-scale Narrow Gauge. Modeling this line would be a significant shift of focus from the D&RGW standard Gauge to its narrow gauge operations. 

Salida - if modeled as more than staging would still allow for the standard gauge to make an appearance. But the yard in Salida would be dual gauge, possible, but much more complex to model. However, operations including the Monarch Branch would be fascinating. The modeling of the route over the pass would be feasible, and Gunnison, as a Narrow Gauge division point supported several branch line operations. A little modelers license would allow for sufficient traffic on the line to be interesting. In particular, helper operations on both the East and West side of Marshall Pass.

A chief question becomes how far west to model. Gunnison makes a lot of sense as the end of the line, but modeling the Black Canyon is more than a little tempting. Recapturing something long gone has its appeal. However, one of the challenges, is that there is a lot less published material on this line than on lines that existed into the modern era. Not living in the region anymore, makes it a bit more difficult to reconstruct the line in sufficient detail to produce a solid model. These are all challenges, plus the fact that while we are seeing some solid steam engines in Z that could be rebuilt into Nn3 K-class locomotives, that would be a fair bit of work to build a prototype roster. It certainly is tempting to instead look at building this route, had it made it into a diesel era due to some source of new traffic discovered after WWII.


So, what would the operational LDEs be:
  • Salida;
  • Poncha Junction;
  • Monarch Branch;
  • Mears Junction (connection to San Luis Valley Line);
  • Shirley and Gray's both had sidings and Water tanks;
  • Marshall Pass;
  • Shawano;
  • Sargent;
  • Parlin (Pitkin Branch Connection); and
  • Gunnison (Crested Butte Branch, Balwin Branch, Kuebler Branch).

If extended to Montrose:
  1. Sapinero;
  2. Lake Junction (and the Lake City Branch);
  3. Cimarron;
  4. Cerro Summit;
  5. Cedar Creek; and 
  6. Montrose.
The Scenic LDEs would be:
  • Marshall Pass Snowsheds;
  • Hilden (Snowsheds and Siding);
  • Shawano Curves;
  • Some of the other siding locations (i.e. Otto, Keene*, Pocono*, Chester, Tank 7, Buxton, Elko, Crookton, Doyle, Bonita, and Steele) Note: * - Single Ended Sidings;
  • Black Canyon;
  • Curecanti Needle;
  • Crystal Creek Climb to Cerro Summit; and
  • the Crystal Creek Bridge.
I know a lot less about this line than I really should. But that too is part of the fun. Considering this route in some fashion is a chance to learn more about the line and perhaps decide that it should b the focus.

Monday, February 20, 2017

On another tangent

Thinking about potential layout designs has not been my only task of late. I've been working with Pat Lana, owner of the Crandic (Model RR) to build a 3D printed model of his Dad's old 1959 Ford FC-150 truck. It took a while, bu in chunks of spare time, I did put together a CAD model of the FC-150, extended it to many of the other variants offered, and delivered prototypes to Pat last fall. Pat took the prototypes and prepped and painted them. He hopes to have an autorack full of them on his railroad. He sent me this picture so that you can get the idea.


Pat's picture shows the as printed model on the left, followed by the cleaned model, a primed model in grey, and 3 painted variations - all around a penny. This is N-scale remember! In addition, I have made and printed additional variants that Pat wanted.


So, with all these variants around, and others asking about it - I decided to open a Shapeways shop. The Model Works at Otowi Station. Eventually, it will get its own blog, but it has a logo. The logo depicts a D&RGW engine at Denver's Union Station, with the image starting as a pencil sketch, becoming a more detailed blue print, to a rough color drawing, a detailed color image, to a photo of the real thing. Kind of a description of designing for 3D printing.


Okay, so if you follow the link, it says coming soon. But that is largely because I have been working on a few more products first. Specifically, I have been developing a T-gauge (1:450) train station and a set of modular wall components. The train station is fantastic, and printed successfully and even includes interior furniture! More on T-gauge in another post, but if you are curious, check out this site.


The station comes in kit form, and printed perfectly the first time. I just need to paint and assemble it now. But, the other project is more pressing. I got the most recent prototypes, generation 3, which finally looked promising enough to finish. As I went, I documented my process. Here are the parts as delivered.


So, here are the parts so far as delivered. We have a solid brick wall, a wall with a standard door, a wall with two doors, and a wall with a freight door. I plan on offering these and several more variants, but the walls are designed with a region where doors and or windows can be cut out of the material so as to obtain exactly the desired spacings.  In addition, the walls come with beveled edges, with brickwork to the edge, or with spots for pilasters to cover the edges of the neighboring sections. Right now I have 90-degree (outside corner) and 180-degree (inline walls) versions ready, but I will also make 45-, 135-, 225-, and 270-degree versions, along with walls that will be the correct length for 45-degree angle walls. Walls will also come in multiple widths and as multiple story units. There will also eventually be roof details, as well as window and door units to fit my standard size holes. Part of the beauty of this is that while I have selected one brick pattern initially, I can actually replicate other patterns. So, this should be a fantastic modular wall product. At least I think so. I still need to figure out pricing, because to get satisfactory bricks in N-scale, I did have to go to a Frosted Ultra Detail print style.

I cleaned the parts with Bestine (i.e. Hexane) for 15 minutes. Then I allowed them to dry. Next, I put the parts in an ultrasonic jewelry cleaner for a 6 minute cycle and allowed them to dry again. Afterwards, the parts became quite white instead of nearly transparent. You can see that in the picture to the right, which was taken after the Bestine soak, but before the ultrasonic cleaning.


At this point, once dry, I primed the parts with light coats of Rust-oleum Paint + Primer. I picked the Cinnamon color as being fairly brick-like. I did two coats on each side allowing the parts to dry between coats.


 First Coat.

After the Last Coat and drying.

You can see the brick work already popping after the final coat. I thought about stopping here, but decided to try the trick of dry-brushing titanium white into the mortar lines. In this case, these lines are less than 0.1mm thick (5/8" in N-scale). Even lines this fine are technically out of scale, but this is quite comparable to the lines on the other modular wall products in N-scale.


At this point, the brickwork pops - probably too much, but some weathering will take care of that. You can really see the offsets between brick courses much better now. So, it came time to put these walls together. If you look at the walls carefully, you will notice that I have a mixture of edges. Some have brickwork to the edge and a 45-degree chamfer on the back. Others have a recess without and brickwork to accept a pilaster. My goal of the test was to build  wall section - 90-degree edge - wall section - 180-degree mate - wall section - 90-degree edge - wall section. So the back would remain open, but I could experiment with the 90-degree and 180-degree pilasters, and the 90-degree mate without a pilaster. I used CAA to glue the parts together. Here are the results.


I think they look pretty good. However, can you see my one assembly mistake? In the second picture above? It is easier from this view.


I attached the second wall on the right, upside down. This is the solid brick wall, and you can tell it is upside down because the framed area on the inside represents the space for doors and windows cutouts to be arranged. But from the outside, no problem. In fact, the project looked so good at this point, I decided to add a roof.


The roof is a simple piece of cardstock, with some ultrafine sandpaper on top. I think it looks really very good. The model will look better with some weathering, doors, and roof details. But those are all next. Right now, I am quite pleased with how the models have come out. Once I work out a reasonable pricing structure, I plan to add these to the shop with the FC-150s and open it up for business. In the meantime, I have a few other ideas on the back burner for the shop. Watch here for a grand opening notice!

Okay, with this out of the way, I am going to try to get back to discussing plans. But, I decided to take this detour because I have started to look at 3D printing as a means to work out some design issues I am seeing in my plans. So, I will come back to 3D printing as a planning tool at some point. 

Next up in my concept discussions is a subtle shift from N to Nn3 - still N-scale, but now with a modeling focus on the Narrow Gauge D&RGW and associated lines.


Wednesday, February 15, 2017

Something a Little Different...

Okay, I am stepping away from my layout idea descriptions to show something else today. On Monday, the Ringling Brothers Barnum Bailey Circus train made its final trip through upstate South Carolina. A number of people from the Central Model Railroad and Historical Association set out to document the final trip. Originally, the train was expected to come through early in the morning, but it was running late and due to track maintenance in nearby Clemson, it got held a few miles out of Clemson near central. That allowed for a few pictures to be taken as the train waited.


 NS9231 (GE D9-44CW) and NS2584 (EMD SD70M) led the train.

 The train stretched down the line for almost a mile.

But before the train could depart, the track crew and equipment had to be moved out of the way. What followed was a parade of work equipment past the waiting cameras.


The work train pulled off on the spur in Central where a fuel truck waited to refuel them. They had been out spreading ballast according to reports.

Still waiting for a Green.

Finally, with the work equipment out of the way, a northbound train was released to make a meet in Central. Only after that train cleared was the circus train allowed to continue southbound. Rod Seel shared this video with the club. Thanks Rod!


I could not make it to see the train come through Clemson, but fortunately, my wife got this video of the train crossing Lake Hartwell outside of Clemson.


It is quite the train - and the end of an era. Thank you Ringling Brothers for all of the fun over the years.

Thursday, February 9, 2017

A Freelanced Rio Grande

I obviously like the D&RGW. I love the tunnels and canyons. The mountain parks and the snowy scenes. I like the isolation, the little pockets of humanity, immersed in a sprawling wilderness full of scenic grandeur. I love the high mountain lakes, the quaking aspen, and the mountain meadows. But if there is anything missing - I find most of the bridges boring. Frankly, the D&RGW has very few notable bridges. There are a few steel trestles hidden in Rock Creek Canyon, the hanging bridge in the Royal Gorge and several smaller river crossings. There was a significant bridge near Glenwood Springs (now gone) and another significant bridge at Green River. There are two very nice bridges near Bond as well, just before the Yarmony Tunnel. But otherwise, the standard gauge D&RGW has very big notable bridges. Too bad, as I like bridges.

Green River Crossing
So, if I had my way, I would have more bridges on the D&RGW, and obviously from the last few posts, I love a lot of things about different parts of the line. Could I pull these elements together into a freelanced D&RGW line? And if I did, what might that line look like?

Okay, if I imagine it, how would I logically combine the elements I love into a freelanced railroad. Well, I think I would start off at a big city, call it City A. There would be some local industry, a grand passenger station, and a major classification yard. There would be interchanges with at least the UP, BN/BNSF, and maybe at least one other road. I'd also have at least one major industry, perhaps a brewery, a steel mill, a refinery or a power plant. Heading out of the city, I would approach the mountains, maybe passing through one or two smaller towns, call them B and C. B could draw elements of Kremmling, Tabernash, and Price. C might be a little larger, and host a helper station and a branch line. Along the way, we cross a couple of long bridges. I could even put the Power Plant here, tucked into the canyon mouth.


Continuing out of C, I'd enter a canyon. Tight, twisting lines, low level bridges, isolated industries and a small town having seen much better days, call it D. Coming out of the canyon, I would have a junction to another branchline and a town located in a valley, call it E. The line would then climb out of the valley, using curves to gain a hold on the hillsides, and enter into a series of tunnels as the line desperately climbs. Tunnels become punctuated with high bridges and the occasional siding as the line climbs into higher canyons. As the line nears the top, the canyons open up into mountain parks, perhaps with one or two small towns with small industries, call them F and G. In G, the line finds a tourist railroad that operates a branch out of town.

The mountain park opens up to small mountain rivers, and number of mountain lakes and marshlands. Ahead, another town appears, with a junction to a substantial branchline originating coal. And a few miles further up the line we reach a summit tunnel. On the otherside of the summit tunnel, we enter a snowbound ski area. The line, now double track, descends through the snow, passing through several tunnels, and snowsheds, over additional bridges to arrive in Town H. Here, the helpers would come off, and the train would continue its descent, heading further towards the end of the line. Crews would change here, and while there is a small yard, it is not a major classification yard. Instead, a small regional railroad operates a former pair of branchlines out of H to reach several isolated but valuable mines.


I guess I see City A as an amalgam of Denver and Pueblo. Town C is a bit like Helper, combined with Minturn, combined with Canon City. The Canyon near C is an amalgam of the Royal Gorge and Eagle River Canyons, with Town D being something like Red Cliff. Town E, might be something close to Salida while F and G are probably amalgams of Pinecliff, Rollinsville, Hot Sulphur Springs, Nathrop, and Buena Vista. Town G may also be a little like Granby. This makes the line between E and F very much like the tunnel district, albeit without the uniqueness of the flatirons.

The summit tunnel would be very much like the Moffat, although the approach may draw a lot more from the approaches to Tennessee Pass. The ski area is a lot like Winter Park/Fraser, and the descent may resemble elements of the Gilluly Loops and the Price River Canyon. Town H, would be a blend of Bond, Malta, Leadville and Utah Junction/Helper. Ultimately, the line leaving H would dive through a pair of tunnels (like Thistle), perhaps with an approach like that to the Yarmony Tunnels.


Okay, the idea has some merit - but I am having a hard time getting over the modeling the D&RGW while freelancing the line. Perhaps if I moved towards a Proto-Freelanced version - maybe the Rio Grande Northern or something like that. I just have a hard time seeing the Rio Grande locomotives, but running through a town that is a mix mash of several other places. But maybe the idea has merit. They are after all, my trains.

The nicest thing about the plan is that it really focuses well on one side of the climb. The final descent is intended to be a lot more minor, so almost all of the climb is on one side of the trip. Yet, it is also designed to go through an entire crew district.

Monday, February 6, 2017

The Belt Line Layout


I think that most people when they think of the D&RGW, think of the trains conquering a mountain pass, traveling through canyons, threading through tunnels, or of its narrow gauge roots. Fewer would think of the lines racing across the desert, or some of the obscure branches that reach out to connect the far flung corners of Utah and Colorado to the world. I had never given much thought to the Belt Line, the operations centered on Denver, at least not until an article in The Prospector. The Prospector is published by the Rio Grande Modeling and Historical Society, which is a wealth of information about the D&RGW in general. However, in this 2006 article, I was introduced to the Belt Line. 
Having been exposed to operating model trains by this point, I had found that I really like dispatching, then being a yardmaster, and then being a road engineer. However, I know a lot of operators treasure the job of running a local switch job. This is also reflected in a lot of modern layout designs, and even a trend towards modeling specific terminals and virtually eliminating the mainline. The Belt Line is that for the D&RGW.
The Belt Line begins at North Yard, and exits through Utah Junction. The line then proceeds across the northern end of Denver, ending up near the Union Pacific 38th Street yard. The line does see some through traffic, once hosting Rock Island Trains into North Yard, but also seeing coal trains either headed for the PSC Cherokee power plant, or being handed off to UP to go east. There are really five jobs that work the branch, each focusing on a particular stretch of track.
The Short Belt Job works the industries close to North Yard, up to the Washington Park lead. The Washington Job works the Washington Park lead to the north of the Belt Line. The Long Belt then works the industries past the Washington Park Job, including the Stockyards branch. In addition, there is the PSC job which works the PSC Cherokee plant. And finally, there is the UP job which runs transfers to the Union Pacific. In addition to these five jobs, the D&RGW was fairly customer friendly and would often send extras out to switch a customer as needed.
In addition, out of North Yard, there is the Rocky Local, which runs west to the Rocky Flats Branch and works industries along the line in Arvada. The Burlington Northern Beer Trains out to the Golden Branch and Coors Brewery to the west often would stop in drop and add cars from the D&RGW at North Yard. There is also a South Denver Local, and a Burnham Local that work parts of the line to the south of North Yard. In addition, there used to be an Association Local that operated to the west through Lakewood to the Denver Federal Center until the mid 1980s. I had forgotten this line until recently, when I came across a few pictures of it, and in particular an at grade crossing of US Highway 6 in Lakewood. It isn't often that a 6 lane highway is interrupted by a grade crossing with traffic lights hanging over the tracks. But I do remember just that!


Parts of the Belt Line are now operated by the Denver and Rock Island Railroad, so there is also room for a shortline to ply the rails.

To model this line, I would focus a bit more on the jobs, than the actual trackage. Operationally, the LDEs would be:
  • North Yard;
  • The Short Belt Job;
  • The Long Belt Job (which I would separate from the Stockyards Job);
  • The PSC Job/PSC Switcher;
  • The Stockyards Job (broken out from the Long Belt Job);
  • The Washington Job; and
  • The UP Turn.

Given enough space, I would love then to add some more jobs, namely the:
  • Rocky Local (which would mean running the main line at least as far as Clay or Plain siding, but also allow me to justify having Denver's Union Station modeled)
  • The Beer Line (which could then also add crews for Coors itself and at Golden Yard)
  • The South Denver Local
  • The Burnham Local; and
  • I would revive the Association Job as well.
That is as many as 12-16 jobs, plus the ability to run some overhead traffic, at least for a few miles out of Denver. Plus, there are some substantial industries to model. The PSC Cherokee Plant, Gates Rubber, Cargill Grain, Coors Brewery, and the Conoco Oil Refinery. Even the Colorado Railroad Museum is not too far from the Golden Branch. Obviously, this plan can be up-sized and down-sized by adding or removing some of the jobs. In most cases, these jobs could even be replaced by staging. The nice thing is that the layout could be very functional once the track for one job was in place. And even with all the sections in place, operations could be very flexible because most of these jobs were not daily, but instead ran a couple of days a week. So, with a few operators, we would just run a few jobs, and with more operators, I would simply up the frequency of jobs.

Scenically, the LDEs include:
  • Denver;
  • Denver Union Station;
  • Barbara Gulch;
  • Big 10 Curves (Rocky/Cliff sidings) including maybe Coal Creek Canyon, and Tunnel 1;
  • Crossings of the South Platte (2) and Cherry Creek (1);
  • US 6 Grade Crossing (if the Association Branch is modeled); and
  • Burnham Shops (Later Denver Diesel)

The scenery does not match up to grandeur of the other layout concepts I have described so far. But I can see that there is a lot of operational potential in the layout. I've operated on a similar layout based on similar jobs focused on Seattle, owned by Pete Doty, which was fantastic. So, I know that this concept would be enjoyable. But, the role of the dispatcher is more minimal. Once trains reach their work areas, they are essentially operating on their own, except for the Short Belt, Long Belt, Rocky and Beer Line jobs. Since the overhead traffic would be only between Plain/Cliff and North Yard (I probably wouldn't model the UP/BN/BNSF traffic, or the Joint Line traffic), what is there for the Dispatcher to do?

One possibility is to virtualize the rest of the line. I've considered just that to extend some of m model railroad concepts beyond the model. Basically, having trains moving on the dispatcher's board until they are ready to emerge on the layout when they would then emerge from staging. This would allow the Dispatcher to coordinate trains entering/leaving the layout with the staging master. Conceptually, these engineers could be entirely virtual, or could be from operators online through a web interface. I have even heard of this being done with a remote Dispatcher controlling the railroad from somewhere else on the internet. It is an interesting idea - a model layout that is virtually enhanced beyond the railroad room.